How to Make a Lithophane: Settings and Photo Tips
How to make a lithophane that glows: pick and edit the photo, then print it with 0.8 to 3.2 mm thickness, white PLA, 100% infill and fine vertical layers.
 By ImgToSTL Team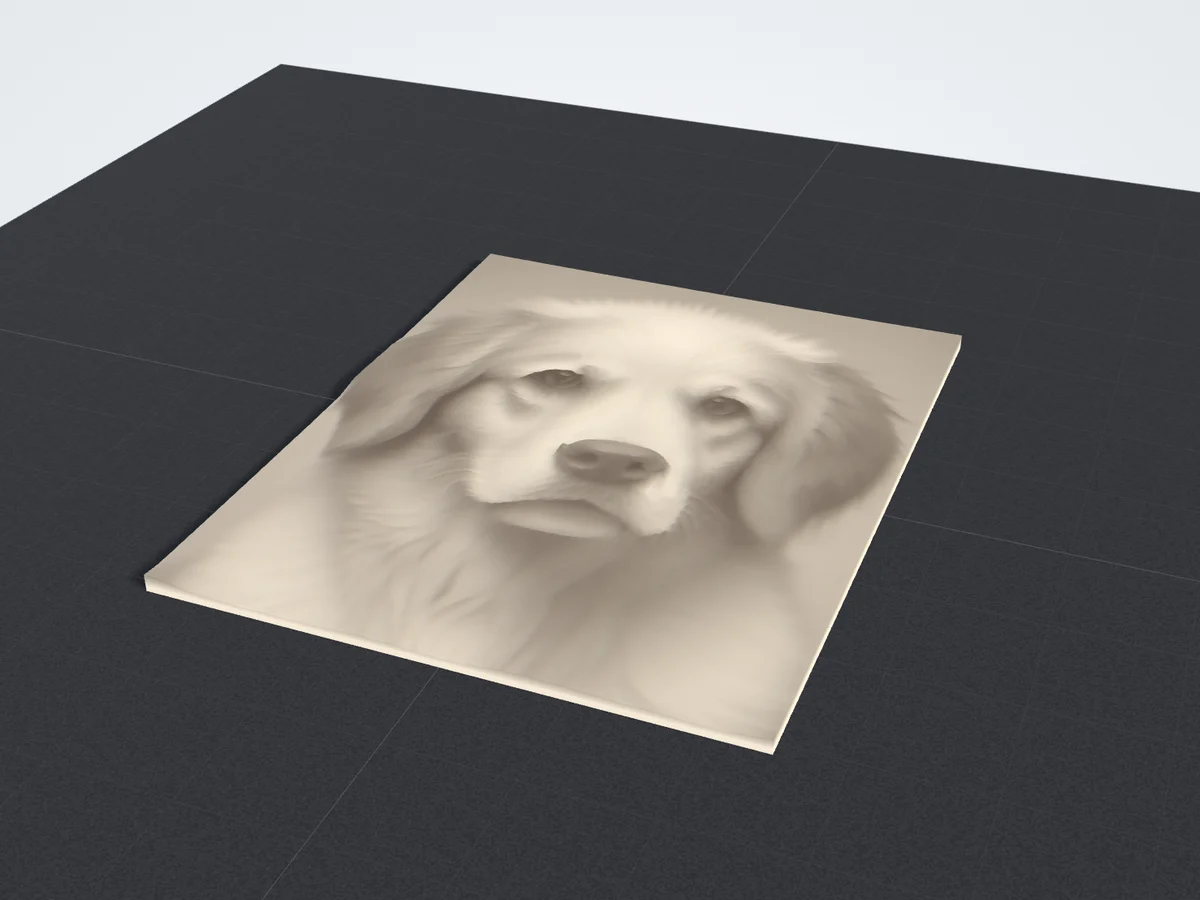
A lithophane is a thin plastic panel that looks like a blank white plaque until you put a light behind it. Then a photo appears. The effect comes entirely from thickness: thin areas let light through and read as highlights, thick areas block it and read as shadows.
That simplicity is why lithophanes are one of the most satisfying things to make on an FDM printer, and also why small settings matter. A panel that is a millimeter too thin looks washed out, and one printed flat on the bed shows every thickness change as a stepped contour. This guide covers the photo, the thickness, the slicer settings and the light.
How a lithophane turns pixels into light
Each pixel of the photo is mapped to a thickness between a minimum and a maximum. Light pixels get the minimum (thin, bright), dark pixels get the maximum (thick, dark), and everything in between scales smoothly. The free lithophane maker does this in your browser and shows a backlit preview, so you can judge the result before you print.
Two numbers control almost everything:
- Minimum thickness sets the brightest highlight. 0.8 mm is a good default: bright, but strong enough to handle. Below about 0.6 mm, highlights become fragile and look see-through even with the light off.
- Maximum thickness sets the darkest shadow. Around 3 to 3.2 mm of white PLA blocks nearly all the light from a typical LED. Going thicker adds print time without much more contrast.
The range between the two is your contrast. 0.8 to 3.2 mm, a 2.4 mm range, is the reliable starting point.
Step 1: choose the right photo
Good lithophane photos have:
- One clear subject that fills most of the frame. Faces, pets, a couple, a building against the sky.
- Soft, even light. Harsh shadows across a face become thick dark patches.
- Contrast between subject and background. A black dog on a dark sofa turns into a dark blob.
- Moderate detail. Small text, distant crowds and grass become noise on a 100 mm panel.
Avoid night shots, backlit subjects with dark faces and tiny screenshots. A phone photo is plenty: 1000 to 2000 pixels on the long side already holds more detail than a 0.4 mm nozzle can reproduce.
Step 2: edit the photo before converting
Five minutes in any photo editor, including the one built into your phone, makes a bigger difference than any slicer setting.
- Crop to the final shape. Decide the aspect ratio now, for example 4:3 for a desk panel, and cut away empty background so the subject gets more pixels.
- Switch to black and white to see what the lithophane will actually show. Colors that looked different can turn into the same gray.
- Lift the shadows. Dark areas print at maximum thickness and lose detail. Brightening shadows and dark midtones keeps texture in hair, fur and clothing.
- Add a little contrast, but stop before skin turns pure white. Pure white prints at minimum thickness with no detail left.
- Calm a busy background by darkening or blurring it slightly, so the subject stands out.
Save it as a high-quality JPG or PNG and load it into the lithophane maker or the JPG to STL converter in Lithophane mode. Leave Invert tones off: that switch prints a negative.
Step 3: set the size and thickness
| Setting | Start with | Why |
|---|---|---|
| Size (longest side) | 100 mm | Suits a desk lamp or night light; larger shows more detail but prints longer |
| Minimum thickness | 0.8 mm | Bright highlights that are still sturdy |
| Maximum thickness | 3.2 mm | Deep shadows with most LED lights |
| Detail | Standard or Fine | Fine gives smoother gradients and a larger file |
Keep the same thickness range when you scale up. A 150 mm panel at 0.8 to 3.2 mm looks just as good as a 100 mm one; it simply has room for more detail.
Step 4: lithophane slicer settings
These settings work in Bambu Studio, PrusaSlicer, OrcaSlicer and Cura with a standard 0.4 mm nozzle.
| Setting | Value |
|---|---|
| Filament | White PLA |
| Infill | 100%, or enough walls to fill the panel |
| Orientation | Standing upright on its bottom edge |
| Layer height | 0.1 to 0.12 mm |
| Outer wall speed | 40 to 60 mm/s |
| Brim | 5 to 8 mm |
| Supports | None |
| Seam position | Aligned or back, so it sits on an edge |
Why white PLA
White or natural PLA gives the most neutral, contrasty result. Colored filament tints the light and lowers contrast, and translucent PETG scatters light so the image looks softer. Not every white PLA is equally translucent, though. If a panel looks too dark even with a good lamp, try another brand or lower the maximum thickness by 0.2 to 0.4 mm.
Why 100% infill
Light should pass through solid plastic, not through a grid. Any sparse infill pattern shows up as a pattern when the panel is lit. Either set infill to 100%, or raise the wall count until walls fill the whole thickness. With 0.45 mm lines, four walls on each side cover a 3.2 mm panel.
Why print standing up
Printed flat, the image is built from stacked layers, so every change in thickness becomes a visible step, like contour lines on a map. Standing up, the thickness changes happen within each layer as the nozzle traces the outline, which gives much smoother gradients. The layer height then sets the vertical resolution, which is why 0.1 to 0.12 mm layers look clearly better than 0.2 mm. At 0.12 mm, a 100 mm tall panel is about 830 layers, so expect a print of a few hours.
Speed, brim and stability
A tall, thin panel can wobble as it grows, and wobble shows up as horizontal lines across the image. Slow the outer wall to 40 to 60 mm/s, reduce acceleration if your printer is very fast, and add a 5 to 8 mm brim so the base cannot peel or tip. Make sure the first layer is clean: the whole panel stands on an edge only 0.8 to 3.2 mm wide.
Flat, curved or lamp?
- Flat panels are the easiest to print and display: in a frame with an LED panel behind, in a window, or on a small LED stand. The ImgToSTL lithophane maker produces flat panels.
- Curved panels bend the image along an arc. They stand on their own, catch light from a single bulb more evenly, and the curve makes them steadier on the build plate.
- Lamps and cylinders wrap one or more photos all the way around a light source. They need a base or socket for the bulb and print upright without supports.
The same photo rules and thickness range apply to all three shapes.
Lighting: the half most people skip
The light behind a lithophane is half of the result.
- Use LEDs, not incandescent or halogen bulbs. PLA starts to soften at around 55 to 60 °C, and a hot bulb close to the panel can warp it.
- Pick the color temperature on purpose. Warm white (2700 to 3000 K) gives the classic amber, old-photo look and flatters skin. Cool white (5000 to 6500 K) looks crisper and bluer.
- Spread the light. A single bright LED right behind the panel makes a hot spot in the middle. Move the light 3 to 5 cm back, add a diffuser (plain white paper works for a test), or use an LED panel that lights the whole area evenly.
- Test before you build a frame. Hold the print against a window on an overcast day, or shine a phone flashlight from a hand's width behind it.
Troubleshooting
- Washed out, low contrast: the light is too strong or the maximum thickness is too low. Use a dimmer light or raise the maximum to 3.4 to 3.6 mm.
- Too dark overall: the photo is dark or the filament is very opaque. Brighten the photo, lower the maximum thickness or use a brighter light.
- Horizontal bands across the image: wobble or uneven extrusion. Slow down, lower acceleration and check that the panel is not flexing as it gets taller.
- Pinholes in the brightest areas: the minimum thickness is too thin. Raise it to 0.8 mm or more.
- A grid pattern when lit: infill is below 100%.
- The panel fell over mid-print: widen the brim, clean the plate with dish soap and water, and slow down the first layers.
Your first lithophane
Pick a photo, give it the quick edit above, and load it into the lithophane maker. Start with a 100 mm panel at 0.8 to 3.2 mm, print it upright in white PLA at 0.12 mm layers, and put a warm LED behind it. Once that works, adjust one thing at a time.