
Finds the real pixel grid
Sprites saved at 4×, 8× or 10× are measured and read back to one block per original pixel.
Drop a sprite and every pixel becomes a block sized in millimeters. Export a watertight STL, or a multi-color 3MF with one part per color. Nothing is uploaded.
Single extruder? Change filament at 1.2 mm to print the blocks in a second color over the base. For an AMS or MMU, download the 3MF.
2 credits per model. STL and 3MF of the same model count once.
Runs in your browser. Your image is never uploaded.
Check the multi-color 3MF before you slice, or turn a logo or photo into a print the same way.
Upload a PNG, GIF or WebP, or try a sample. Transparent pixels stay empty, and an upscaled sprite is read back to its real pixel grid.
Pick the size of one pixel, the block height and a base plate. Height by color raises each color one step for relief and filament swaps.
Save an STL for one color, or a 3MF with one part per color for an AMS or MMU. Both are closed meshes that slice without repair.
The heart sample and the blocks this tool builds from it.

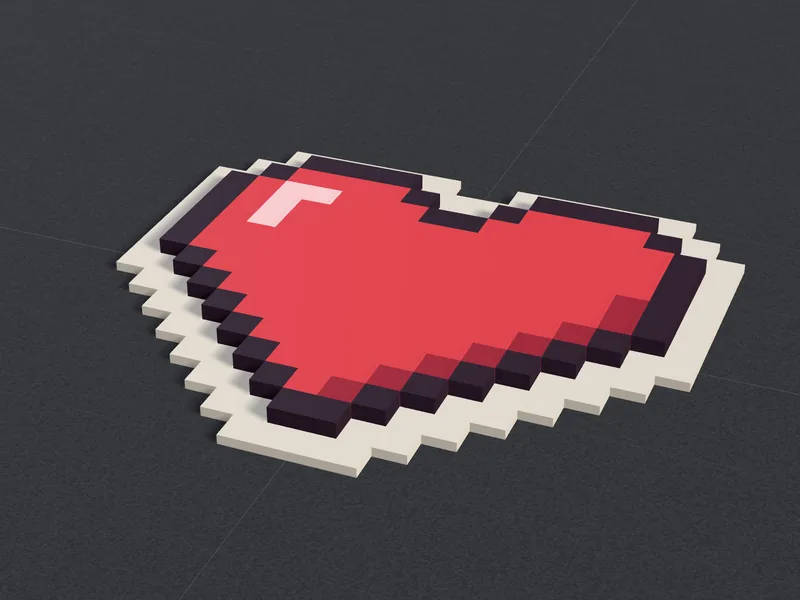
Built for sprites, so every pixel stays a clean square block.
Sprites saved at 4×, 8× or 10× are measured and read back to one block per original pixel.
Clears a solid background color from the edges inward, while the same color inside the sprite stays.
Near-identical shades are merged, and the Max colors slider cuts the palette down to the filaments you have.
Each color is its own named part for an AMS, MMU or tool changer. An STL is there for one color.
Add a base that follows the outline or a square one, up to 5 mm thick, plus a loop for a key ring.
The tool counts pixels that would print as loose pieces and flags blocks narrower than 0.8 mm.
Four choices that keep every pixel square and every color on its own layer.
A 0.4 mm nozzle needs about 0.8 mm to draw one pixel. From 2 mm up, the corners stay crisp.
Keep block heights and the color step in multiples of your layer height, such as 0.6 mm for three 0.2 mm layers.
Print the first layer at 20 to 30 mm/s and keep the base plate on for thin or diagonal sprites.
0.2 mm layers, 3 walls and 15 to 20% infill, with ironing on the top layer for smooth pixel faces.
Small sprites print fast and read clearly from across a room. These are the four most common uses.
A 16 × 16 sprite at 2.5 to 3 mm per pixel, a 1.2 mm base and the keychain loop. Keep it 3 mm thick or more so it survives a pocket.
The flat back takes a glued 10 mm round magnet. A 1.6 mm base keeps the magnet from showing through light colors.
A 32 × 32 sprite at 3 mm per pixel makes a 96 mm coaster. Use a 2 mm Square base and Flat top blocks about 1 mm high so a cup stands level.
Larger sprites at 4 to 6 mm per pixel make wall art. Height by color adds depth, and the 3MF lets an AMS print every color in one go.
How the blocks are built, print sizes and multi-color printing in detail.
Every opaque pixel turns into a square column. Pixel size sets the width of each column in millimeters, and block height sets how tall it stands. Transparent pixels, and any pixel under half opacity, stay empty, so a sprite on a clear background prints as its own outline.
Sprites shared online are often scaled up 4×, 8× or 10× so they look sharp on screen. The converter measures where the color edges fall, finds the block size and reads the image back to its real grid, so a 32 × 32 sprite saved at 320 × 320 still gives 32 × 32 blocks. If the sprite sits on a solid color, Remove background color clears that color from the edges inward and keeps the same color inside the sprite, such as the white of an eye.
Colors are merged into a palette of up to 8. Shades that differ only by anti-aliasing or JPEG noise become one color, and the Max colors slider merges the closest pairs when you want to load fewer filaments.
Print size is the sprite size times the pixel size. A 0.4 mm nozzle needs about 0.8 mm to draw a single pixel cleanly, and pixels of 2 mm or more keep crisp corners. The table gives starting points; the readout under the preview shows the exact size as you drag.
8 × 8
16 × 16
24 × 24
32 × 32
64 × 64
128 × 128
Download the 3MF to print every color in one go on a Bambu Lab AMS, a Prusa MMU or any multi-material printer. Each palette color is its own part of one object, named with its hex code, and the base plate is a separate part. Open it in Bambu Studio, OrcaSlicer or PrusaSlicer and assign a filament to each part.
With a single extruder, switch to Height by color. Each color then sits one step above the color below it, so above a given height only that color is printed. Add a filament change (M600, or the color change marker in your slicer) at each height listed under the settings, and the top of every block comes out in its own color. The sides show stripes of the colors below, which is part of the 3D pixel art look.
Order matters: the lowest color prints first and also fills the base plate. Use the arrows next to each color to move it up or down, and keep the step a multiple of your layer height (0.6 mm is three 0.2 mm layers) so every change lands exactly on a layer.
Print flat on the bed with 0.2 mm layers, 3 walls and 15 to 20% infill. Block heights in steps of 0.2 mm keep every top surface on a full layer, and ironing on the top layer gives each pixel a smooth, even face.
Small parts depend on the first layer. Slow it to 20 to 30 mm/s, clean the plate, and keep the base plate on for sprites with thin or diagonal parts so nothing lifts. For a keychain, aim for 3 mm or more in total, such as a 1.2 mm base plus 2 mm blocks. The loop wall stays about 2 mm wide or more at every pixel size.
Answers about images, scaled sprites, colors, loose pieces, keychains and privacy.