How to Convert an Image to STL for 3D Printing
Learn how to convert an image to STL with relief, lithophane, silhouette or AI 3D, which picture to use, sizes and depths that print, and slicer tips.
 By ImgToSTL Team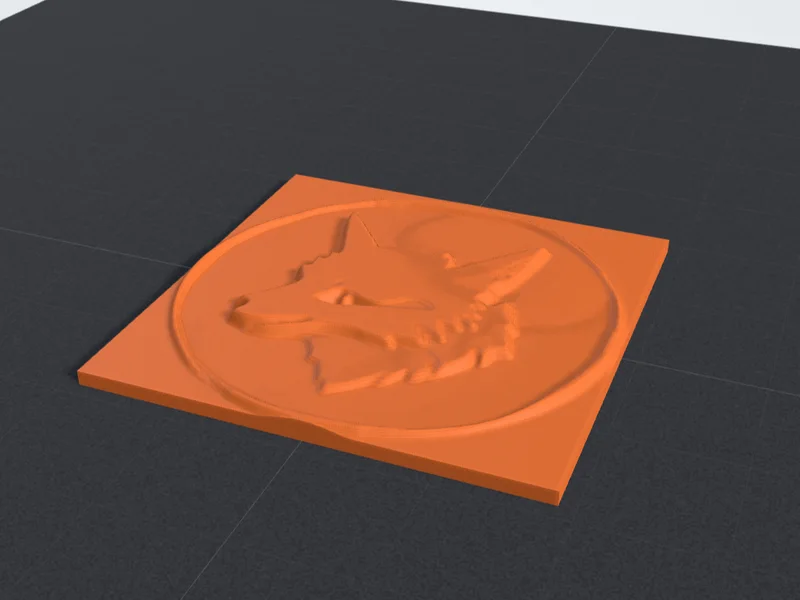
An image is a flat grid of pixels. An STL is a closed surface made of triangles. To convert one into the other, something has to decide what the third dimension means: how tall each part should be, which parts to keep, or what the hidden back of the object looks like. There are four common ways to make that decision.
This guide walks through all four, how to pick an image that suits each one, the sizes and depths that actually print on an FDM printer with a 0.4 mm nozzle, and the slicer settings that finish the job. You can follow along with the free image to STL converter, which runs in your browser.
Four ways to turn a picture into a 3D shape
1. Relief (heightmap)
A relief reads the brightness of every pixel and turns it into height above a solid base. By default dark pixels rise and light pixels stay low, so a black logo on a white background becomes a raised logo on a flat plate. If your artwork is light on dark, flip it with the Raise light areas instead switch.
Reliefs suit logos, badges, name plates, house numbers, coasters and signs: anything that is read from the front in normal light. The PNG to STL and logo to STL pages are set up for this, and transparent PNG backgrounds stay flat.
2. Lithophane
A lithophane uses the same brightness-to-thickness idea, but in reverse and for a different purpose. Dark pixels print thick and block light, bright pixels print thin and let it through. Under room light the print looks like a plain white plaque; put a lamp behind it and the photo appears. Use the lithophane maker for photos of people, pets and places.
3. Silhouette cut-out
A silhouette ignores shades of gray. Every pixel darker than a cut-off value becomes solid at one even thickness, and everything else is removed, including holes inside the shape. There is no base plate. This is the mode for cake toppers, stencils, ornaments, wall art and cookie-cutter outlines. Try it on the silhouette to STL page.
4. AI full 3D model
The first three methods all produce an object with a flat back. If you want a figurine, a bust or a toy you can walk around, the hidden sides have to be invented from a single view, which is what AI image-to-3D models do. The result is a full mesh with sides and a back. It needs more checking before printing (scale, thin parts, supports), which we cover in how to 3D print AI generated models.
| Method | What the image controls | Best for | Start with |
|---|---|---|---|
| Relief | Height above a base | Logos, signs, badges, coasters | 1.2 to 3 mm relief on a 2 to 4 mm base |
| Lithophane | Thickness, so how much light passes | Photos for lamps and window panels | 0.8 mm min, 3.2 mm max thickness |
| Silhouette | Which areas exist at all | Cake toppers, stencils, ornaments | 3 mm thick (1.5 mm for stencils) |
| AI 3D | The whole shape, back included | Figurines, busts, toys, props | Resize, then orient and add supports |
Pick an image that suits the method
For reliefs, use flat, high-contrast artwork: a single-color logo on a plain background, line art, or a drawing traced in black ink. Gradients, drop shadows and textures all turn into bumps. A PNG export of a vector logo at about 1000 pixels wide is ideal. JPG files work, but heavy compression leaves faint blocks and halos around edges that show up as noise on the base. If you only have a JPG, the JPG to STL converter handles it; raise the contrast first so the background becomes pure white.
For lithophanes, choose a well-lit photo where the subject fills most of the frame. Faces, pets and landscapes with some sky work well. Crop tightly, and brighten very dark photos, because dark areas become thick plastic that needs a strong light.
For silhouettes, the cleanest source is already a silhouette: a black shape on white. A photo can work if the subject stands out sharply from its background.
For AI 3D, use one object, centered, on a plain background, shot from the front in even light. Clutter and multiple subjects confuse the reconstruction.
How many pixels do you need?
A 0.4 mm nozzle lays down a line about 0.4 to 0.45 mm wide, so a 100 mm print can show only a couple of hundred distinct lines across its width. Around 10 pixels per millimeter of print size is already more detail than the nozzle can draw. An image of 1000 to 2000 pixels on the long side covers almost every desk-sized print; going higher mostly makes the STL bigger.
Step by step: convert an image to STL
- Open the image to STL converter and drop in a PNG, JPG or WebP (up to 10 MB). Relief, lithophane and silhouette conversion runs in your browser, so the image is never uploaded.
- Pick the output type: Relief, Lithophane, Silhouette or AI 3D.
- Set the size of the longest side in millimeters. This is the size that lands on your build plate.
- Set the depth: relief height and base thickness, lithophane minimum and maximum thickness, or silhouette thickness and cut-off.
- Rotate the live preview and look for problems: details that are too thin, a background that is not flat, letters that fall out.
- Download the STL and open it in Bambu Studio, PrusaSlicer, Cura or OrcaSlicer.
Sizes and depths that print well
These starting points assume PLA, a 0.4 mm nozzle and 0.2 mm layers.
| Longest side | Raised height or thickness | Base | |
|---|---|---|---|
| Keychain | 40 mm | 1.2 mm relief | 2 mm |
| Badge or coaster | 60 to 90 mm | 1.5 mm relief | 2 mm |
| Desk sign | 160 mm | 2.5 mm relief | 3 mm |
| Wall plaque | 200 mm | 3 mm relief | 4 mm |
| Lithophane panel | 100 mm | 0.8 to 3.2 mm thickness | None |
| Cake topper | 80 to 120 mm | 3 mm silhouette | None |
| Stencil | 100 to 200 mm | 1.5 mm silhouette | None |
A few rules hold no matter what you print:
- Lines need to be about two nozzle widths wide. Details under roughly 0.8 mm across may print as a single wobbly line or vanish in the slicer. If fine details disappear, make the whole print bigger.
- Text needs height. Raised letters at least 4 mm tall stay readable. Smaller than that, the holes in letters like "e" and "a" fill in.
- Match heights to your layer height. A 1.2 mm relief at 0.2 mm layers is exactly 6 layers, so the top surface comes out flat instead of ending on a partial layer.
- Check your build plate. Common beds are 180 x 180 mm (Bambu Lab A1 mini), 220 x 220 mm (Creality Ender-3 V3 SE), 250 x 210 mm (Prusa MK4) and 256 x 256 mm (Bambu Lab A1, P1S and X1C). Leave a few millimeters of margin, more if you add a brim.
Slicer tips for image-based prints
Reliefs and silhouettes print flat, face up, with no supports. For a crisp top surface, turn on ironing for the topmost layer (available in Bambu Studio, PrusaSlicer, OrcaSlicer and Cura). For fine artwork, drop to 0.12 or 0.16 mm layers, or use variable layer height so only the raised part gets thin layers.
Two-color reliefs are easy. In the slicer's preview, move the layer slider to the first layer of the raised design and add a filament change there. The base prints in one color and the design in another. Bambu Studio, PrusaSlicer and OrcaSlicer all add the change from the layer slider; with an AMS or MMU the swap is automatic, otherwise the printer pauses for you.
Lithophanes print standing up, in white PLA at 100% infill, with fine layers around 0.1 to 0.12 mm and a brim to stop the panel tipping over. Our lithophane guide covers every setting.
Small cut-outs like cake toppers and earrings can lift at the corners. A 3 to 5 mm brim, a clean plate and a slower first layer fix most of it.
Common problems and quick fixes
- The background is bumpy. The image has noise, JPG artifacts or a soft gradient. Clean the background to pure white or use a transparent PNG.
- The logo came out sunken instead of raised. The artwork is light on dark. Flip the light and dark setting before you download.
- Part of a silhouette disappeared. It was lighter than the cut-off. Raise the cut-off or darken that part of the image.
- The middle of an O or A fell out. Enclosed islands in a silhouette become loose pieces. Use a stencil font or connect them with a thin bridge.
- The slicer reports mesh errors. Files from ImgToSTL are closed, manifold meshes, but files from other tools may not be. Open the file in the STL viewer to check whether it is watertight.
Which method should you choose?
If the image is a logo or graphic and you want it readable on a wall or a desk, choose relief. If it is a photo and you want it to glow, choose lithophane. If the outline is the design, choose silhouette. And if you need the object itself, with sides and a back, choose AI 3D.
Whichever you pick, start small: a 60 mm test print is quick, shows you whether the depth and detail work, and saves filament on the full-size version.