How to Turn a Photo into a 3D Model: 4 Methods
How to turn a photo into a 3D model: free single-photo methods, AI image to 3D, photogrammetry from many photos, and how to make the result ready to 3D print.
 By ImgToSTL Team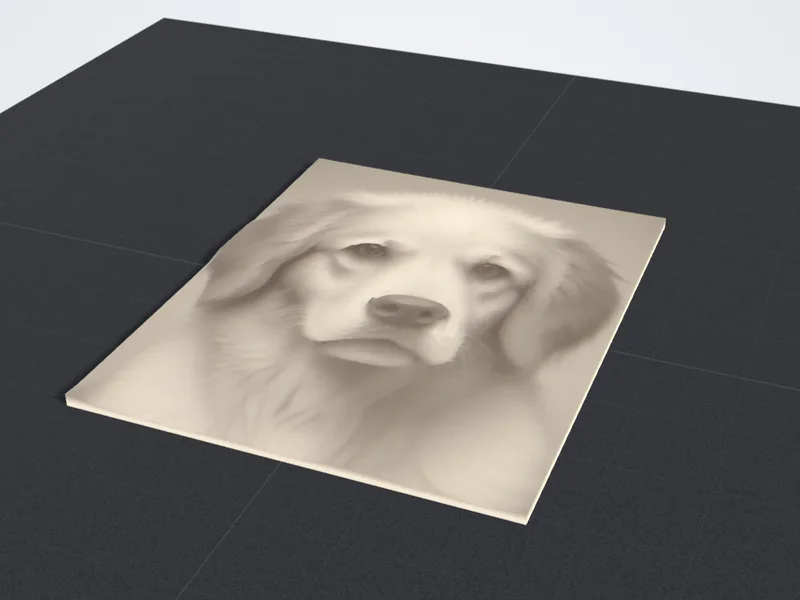
Before you decide how to turn a photo into a 3D model, count your photos. One picture can become a relief, a lithophane, a silhouette or, with AI, a full figurine. A set of photos taken all the way around an object can become a measured scan. The methods differ a lot in effort and in how faithful the result is to the real thing.
A photo records color and light from one viewpoint, and depth is simply missing. Every method has to supply it from somewhere: a rule that turns brightness into height, the outline of a shape, a learned guess about the hidden side, or geometry worked out from many viewpoints. This guide covers 3D printing from a photo in four parts: single-photo methods that work today for free, AI image to 3D, photogrammetry, and making the result printable.
How to turn a photo into a 3D model: the methods compared
| Method | Photos needed | Time | Cost | Best for |
|---|---|---|---|---|
| Lithophane | 1 | Minutes | Free | Portraits, pets, night lights |
| Relief | 1 | Minutes | Free | Logos, drawings, signs |
| Silhouette | 1 | Minutes | Free | Profiles, cake toppers, ornaments |
| 2D to 3D height map | 1 (or a depth map made from it) | Minutes | Free | Terrain, depth-map reliefs |
| AI image to 3D | 1 | 1 to 3 minutes, plus cleanup | 25 to 35 credits per model | Figurines, mascots, toys |
| Phone photogrammetry | Dozens | An hour or so, plus cleanup | Free tiers, paid plans | Copies of real objects |
| Desktop photogrammetry | Dozens to hundreds | Several hours | Free to paid | Detailed, accurate scans |
The single-photo methods give you a flat-backed object in minutes. AI gives you a full object from one view, but the back is invented. Photogrammetry is the only route that measures the object, and it asks the most of you.
Part 1: single-photo methods that work today
If you want to know how to make a 3D model from a picture without any modeling, start here. All four run free in your browser, and the photo never leaves your device. Each one decides depth in a different way, so the same photo can succeed in one and fail in another.
Lithophane
A lithophane turns the photo into thickness: dark areas print thick, light areas thin, and the image appears when a lamp shines through it. It is the best single-photo method for faces and pets, because it keeps the shading as light instead of turning it into fake depth. Use the lithophane maker, and see the lithophane guide for print settings.
Relief
The image to STL converter in Relief mode raises dark areas above a flat base. It is ideal for logos and drawings, but on a normal photo it confuses lighting with shape: a dark shirt rises, a bright cheek sinks. For photos, simplify first by raising the contrast or reducing the image to a few tones.
Silhouette
Silhouette to STL keeps only the outline and cuts it out at one even thickness. A side-on portrait, a pet in profile or a plant against the sky makes a clean cut-out. Shoot the subject against a bright, plain background so it reads as one dark shape.
2D to 3D height maps
The 2D to 3D converter works best when brightness really does mean height. A grayscale terrain map is the classic case. You can also make your own: open-source depth estimation models such as MiDaS and Depth Anything predict a depth map from a single photo, usually with nearer areas lighter. Load that depth map in Relief mode, turn on Raise light areas instead, and you get a bas-relief that follows the real shape rather than the lighting.
The image to STL guide has the sizes and depths that print well for all of these.
Part 2: AI image to 3D
When you want an object you can walk around, such as a figurine, a bust or a toy, AI reconstruction builds a full mesh from one picture. The camera never saw the back, so the model has to infer it. Image-to-3D systems are trained on large collections of 3D objects, and from them they learn how shapes usually continue out of view: a car has wheels on both sides, a dog has four legs. Some systems first imagine the object from several angles and then fuse those views into a mesh; others predict the 3D shape directly.
The result follows your photo closely on the front and is a plausible guess everywhere else. That works well for characters, animals and familiar objects, and poorly for anything unique on the hidden side or anything that must fit precisely. A photo also carries no real size, so you set the scale yourself.
Our image to 3D model tool builds one from a single photo in one to three minutes, for 25 to 35 credits, and you can download it as GLB, STL or OBJ. When you have a model, from us or elsewhere, how to 3D print AI generated models covers scale, thin parts and supports.
Part 3: photogrammetry from many photos
Photogrammetry does not guess. The software finds the same details in overlapping photos, works out where the camera stood for each shot, and triangulates those details into a dense point cloud and then a mesh. Done well, it captures the real shape, including the back.
How many photos to take
For a small object, a common starting point is two or three rings of photos at different heights, with a step of about 10 to 15 degrees between shots. That gives 24 to 36 photos per ring. Add close-ups of fine details, and a few shots from above. More photos rarely hurt; blurry ones do.
Overlap
Each photo should share most of its view with the next one; many guides recommend 60 to 80 percent overlap. Keep the object large in the frame and move in small steps rather than jumping around it.
Lighting and surfaces
Use soft, even light: an overcast day outdoors, or a bright room without direct sun. Avoid flash and hard shadows, and keep the lighting the same for the whole set. If you use a turntable with a fixed camera, put a plain backdrop behind it, because a busy background that stays still confuses the alignment. Standing the object on a printed page, like a newspaper, gives the software extra detail to lock onto.
Shiny, transparent, very dark and plain single-color surfaces have no stable detail to track and scan poorly. A light coat of matte scanning spray helps if the object can take it.
Tools
- RealityScan from Epic Games: a free phone app that guides you around the object.
- Polycam: photo mode on iOS and Android, plus LiDAR scanning on iPhone Pro and iPad Pro models. It has a free tier with limits and paid plans.
- KIRI Engine: photo scanning on iOS, Android and the web, with a free tier and a paid plan.
- Meshroom: free, open-source desktop software built on the AliceVision framework. Its standard pipeline expects an NVIDIA graphics card.
- Agisoft Metashape: paid desktop software used in professional work.
Free-tier limits and prices change often, so check before you start a big project. Phone LiDAR suits rooms and furniture; for small objects, photo mode usually captures more detail.
Part 4: make the result printable
A scan or an AI model is a starting point, not a print file. Check these before slicing:
- Watertight. Scans usually have a hole where the object sat, and gaps where the camera could not see. Close small holes in Blender or MeshLab; MeshLab's Screened Poisson reconstruction can rebuild a closed surface from a whole scan. Many slicers repair small errors on import, but not large gaps.
- A flat base. Cut the bottom flat so the model sits on the bed. PrusaSlicer, Bambu Studio and OrcaSlicer all have a Cut tool, and Blender has Bisect in Edit Mode.
- Scale in millimeters. Photogrammetry without LiDAR, and AI, carry no real size. Measure one distance on the real object with calipers, compare it with the model, and scale to match.
- A sensible triangle count. Scans often run to millions of triangles, more than any nozzle can show. Reduce them with Blender's Decimate modifier or MeshLab's Quadric Edge Collapse Decimation.
- Check it. Open the file in the STL viewer to see the dimensions, the triangle count and whether it is watertight.
- Convert it. Scans often come out as PLY or OBJ: use PLY to STL or OBJ to STL, both with Resize longest side. A PLY that holds only points has no surface yet; mesh it first. AI models usually arrive as GLB, which GLB to STL converts.
For wall thickness, overhangs and clearances, use the checklist in how to make 3D models.
Which photo works: a checklist
- Sharp. In focus where it matters, with no motion blur. Zoom in on the eyes or edges before you use it.
- Soft, even light. Hard shadows become bumps in a relief and holes in a scan. Blown-out highlights lose detail.
- Plain background. One clear contrast between subject and background helps silhouettes and AI.
- Whole subject in frame. Nothing cropped off, and the subject filling most of the picture.
- Enough pixels. 1000 to 2000 pixels on the long side is plenty for single-photo methods.
- The original file. Messaging apps often compress photos; use the camera original rather than a forwarded copy or a screenshot.
- One subject. For AI, a single object on its own, from the front or slightly to one side.
- No filters or text. Effects and overlays turn into shapes you did not want.
- Matte, opaque surfaces. Glass, chrome and mirrors fail in AI and in photogrammetry.
- One consistent set. For photogrammetry, the same light and camera settings throughout, with an object that does not move.
Start with the photo you have
One good photo of a face or a pet: make a lithophane today. A logo or a drawing: make a relief. A figurine: try AI image to 3D. And if you can hold the object, photograph it from every side and let photogrammetry measure it.